Panopto Tutorials:
Panopto Desktop App
Tutorial on how to use the Panopto Desktop App.
Windows App
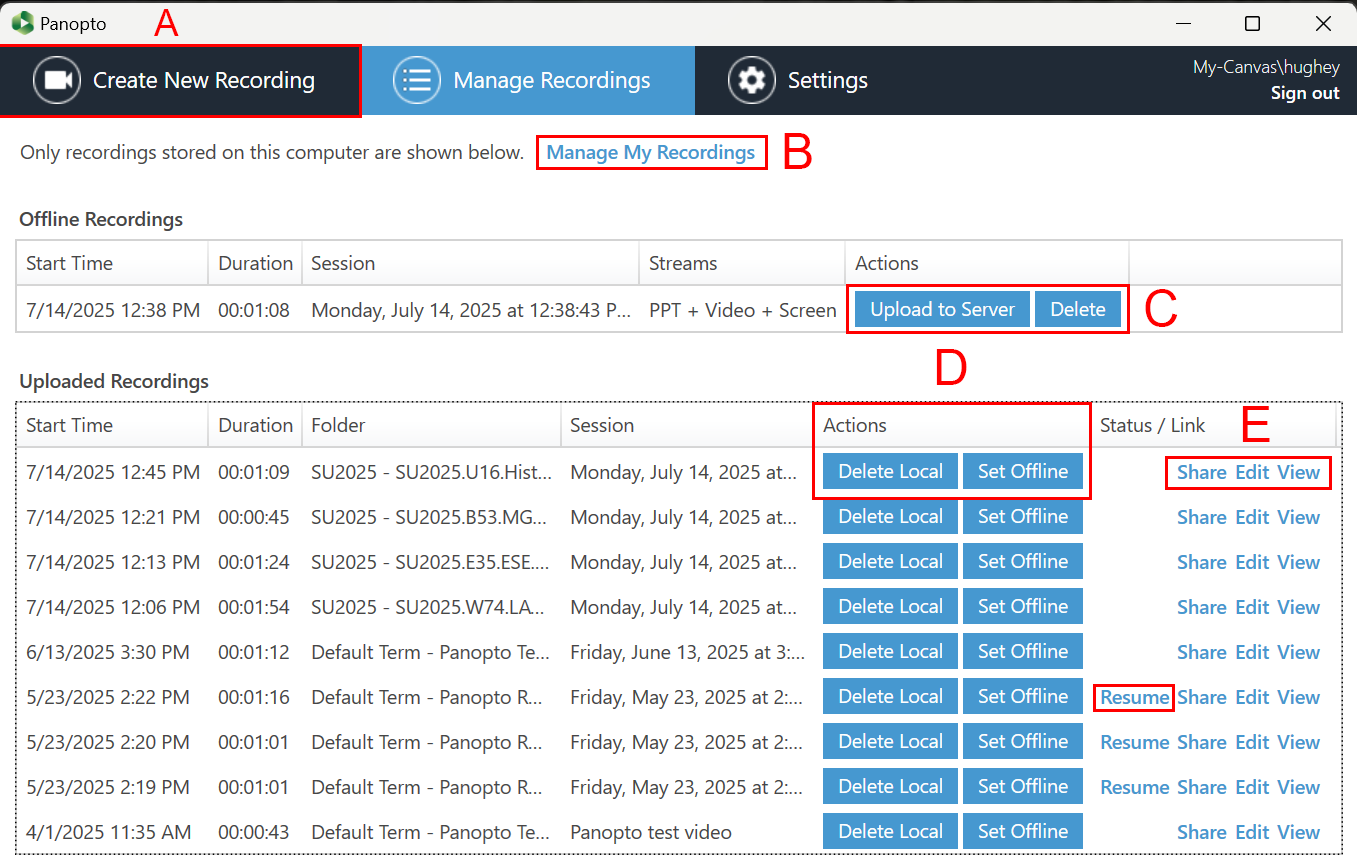
- A: The “Create New Recording” tab will take you to the create a recording page [LINK TUTORIAL].
- B: “Manage My Recordings” will take you to the Panopto web interface [LINK TUTORIAL].
- C: This is the section will affect your Offline Recordings.
- Upload to Server will upload an offline recording to the online server.
- Delete will locally delete the recording.
- D: This section will affect your Uploaded Recordings.
- Delete Local will locally delete the recording.
- Set Offline will remove a recording from the online server but keep it locally.
- E: This section will affect your Uploaded Recordings.
- Share will allow you to view sharing options for the video on the Panopto web interface. [LINK TUTORIAL]
- Edit will allow you to edit the video on the Panopto web interface. [LINK TUTORIAL]
- View will allow you to view the video on the Panopto web interface. [LINK TUTORIAL]
- Resume will re-uploading recordings that didn’t get uploaded properly.
Mac App

- A: “Create New Recording” will take you to the recording page. [LINK TUTORIAL]
- B: “Manage Online Recordings” will take you to the Panopto web interface [LINK TUTORIAL].
- C:
- Share will allow you to view sharing options for the video on the Panopto web interface. [LINK TUTORIAL]
- Edit will allow you to edit the video on the Panopto web interface. [LINK TUTORIAL]
- View Online will allow you to view the video on the Panopto web interface. [LINK TUTORIAL]
- D:
- Delete will delete your recordings. [CHECK IF IT’S LOCAL OR NOT]
- Actions will allow you to make a local copy of the recording and take you to the mp4 file stored in your computer.
You will also have the ability to re-upload a corrupted recording on the app. You will know something went wrong if you have the Retry option:
