Poll Everywhere Tutorials:
Instructions for Faculty
Getting Started
- Email your school administrators and ask them to add you to the university account.
- Use links on the invite email to sign up for an account on Poll Everywhere using your WUSTL email address.
- Once you are on the university’s license, you will be able to go to your settings and change your username to something different than the default, which is handy because this is what students will type in to access the poll.
- In the bottom left corner, click the Profile button:

- At the top of the screen, you will see the Username information. You can change your username there.
- In the bottom left corner, click the Profile button:
- Next, you may want to adjust the default settings for your activities to save time later when making questions:
- From the Profile page, choose Activity Settings in the left menu.
- Then review all settings and choose the default you want for every question. Each of these default settings can be changed for individual questions.
- Recommended: Under “Show instructions or results,” select “Show the instructions” if you want students to respond first without seeing a chart of how other students respond
- You may want to bookmark this link, https://www.polleverywhere.com/activities, which will take you directly to your polls when you are signed in. Otherwise, from the home page, https://www.polleverywhere.com/, you will have to click on Activities button on the top right corner to get to your polls.
Creating Polls
- Create poll questions from your activities dashboard in the web interface, or using add-in for Powerpoint, Google slides, or Keynote:
- We recommend creating polls in the web interface, but regardless of which interface you use, you’ll use a similar process for creating activities (what Poll Everywhere calls their poll questions).
- Click New Activity
- Select the type of activity and enter content
- Click Create
- Poll Everywhere has several different types of activities that you can create:
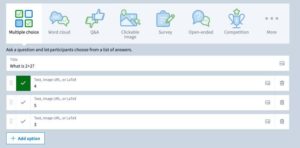
-
- Images can be used in question titles and response options in Multiple Choice, Word Cloud, and Open-ended activities
- TeX or LaTeX can be used in question titles and response options
- HTML formatting can be used in titles only
- After you create a poll, you may want to test your poll with a side-by-side student/instructor view:
- In the right toolbar, select the “2.Test” tab
- Try changing answers, Show/Hide Responses, Lock/Unlock, Show/Hide Correct
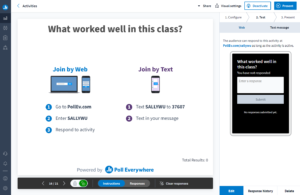
- You can also edit its settings in the “1.Configure “tab. Your default settings will be applied to each new poll (see Getting Started section above), but you can always change the settings for each individual poll. Some most common configurations are:
- Audience restriction: Identify students with screen names or Restrict the activity to registered participants only
- Response settings: Limit or expand total responses per participant
- If you will run polls with PowerPoint, Google Slides, or Keynote slides, use your add-in to insert a slide of your poll.

![]()
-
- For users who already have iClicker questions in your PowerPoint slides, another option is to use the “Convert” function in the add-in for PowerPoint. Unfortunately, this is currently only available for Windows computers.
- You will need to move the question into the title of the slide for the conversion to work, but this will be the fastest way to transfer existing questions.
- For users who already have iClicker questions in your PowerPoint slides, another option is to use the “Convert” function in the add-in for PowerPoint. Unfortunately, this is currently only available for Windows computers.
- If you do not use slides, you can directly present polls from your web browser (see the “Running Polls” section below).
Running Polls
- The flow for presenting with PowerPoint, Keynote, or Google Slides is as follows:
- Present slides using the Present mode.
- When you get to a slide with a Poll Everywhere question, it will automatically activate.
- “Activate” means that the question is available for students to respond to. Only one question can be activated at a time. Deactivating the poll will remove the question from student view.
- Moderate the poll as described below.
- When done, move on to the next slide as usual
- Moderating the poll
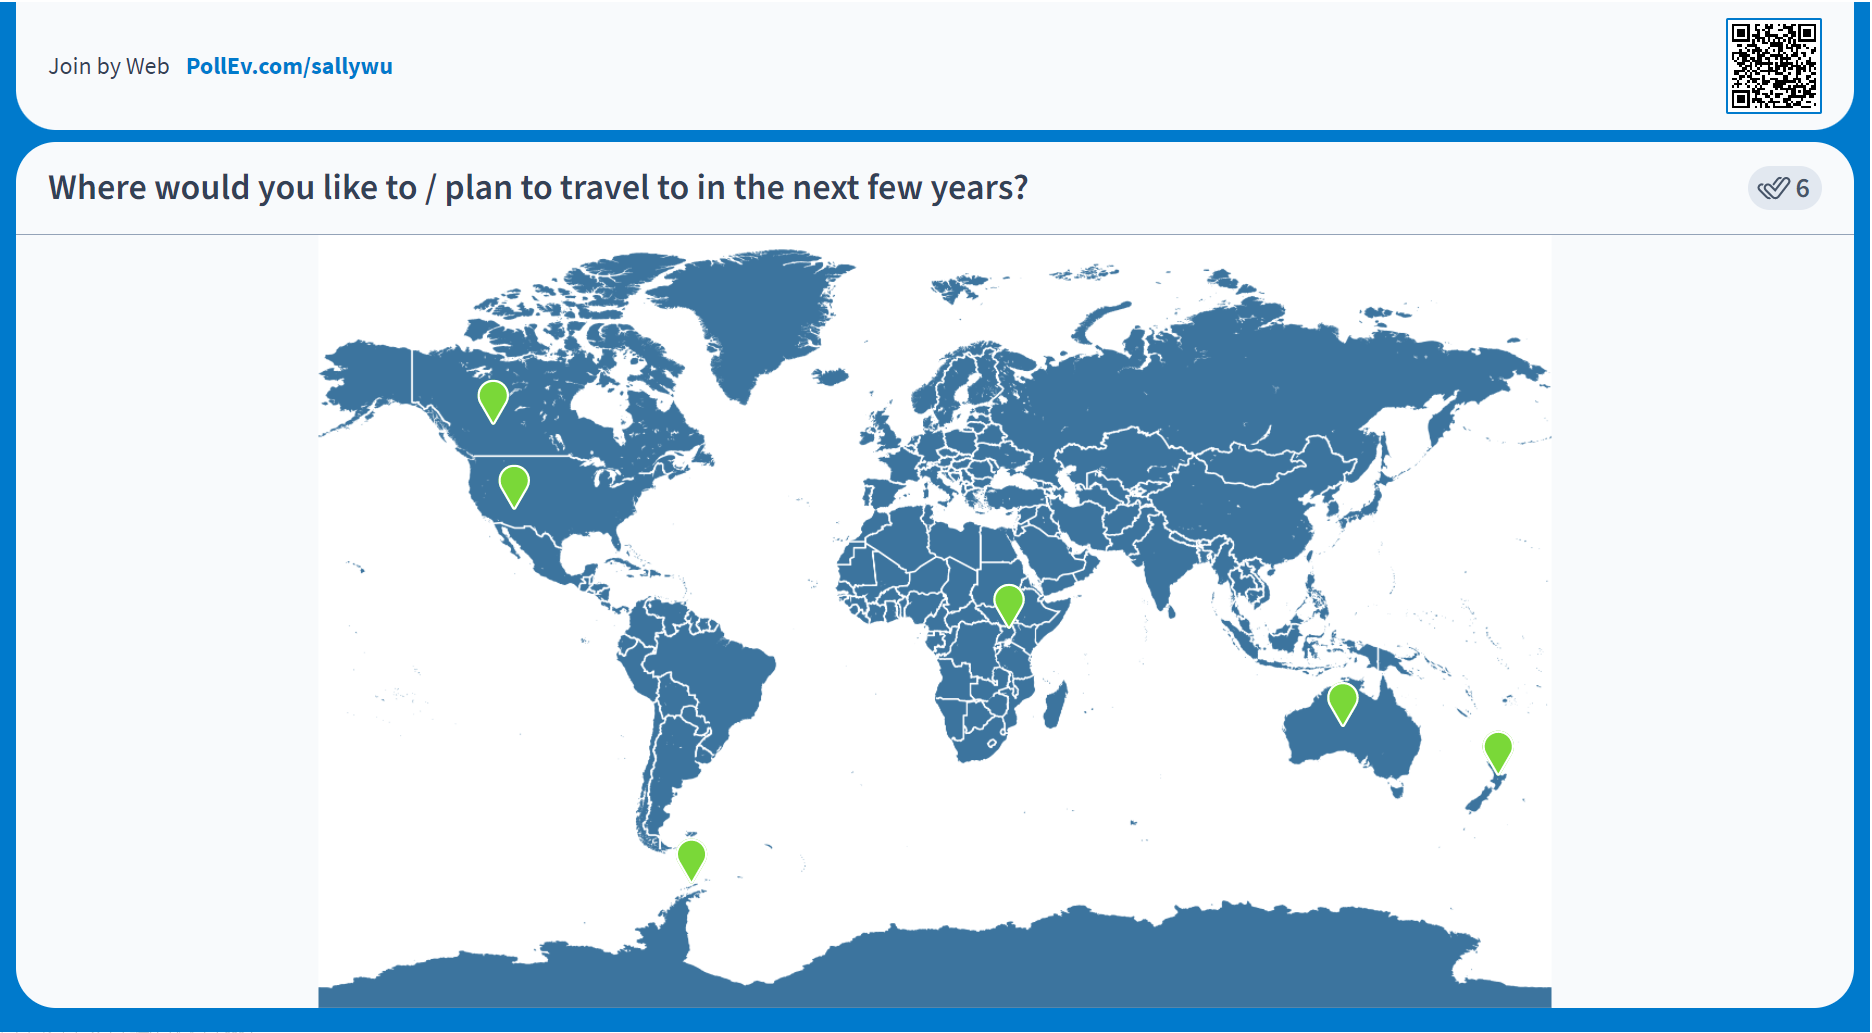
- Ask student to complete the poll
- Remind students that the instructions for accessing the poll is at the top of the slide.
- The Total Results counter in the top right shows how many students responded
- Ask student to complete the poll
-
- Mouse over to the bottom of the screen and a moderation toolbar will appear
- Click the Lock icon so that students cannot add or change their responses, if desired
- Click Responses, which will show a visual tally of student responses
- For multiple-choice questions, toggle to Correctness, which adds a checkmark to the correct response that you selected when creating the question, if applicable
- You may also need to “Clear responses” if you are running the same activity with multiple class sections. This archives the existing responses and allows you to reuse your activity.
- Mouse over to the bottom of the screen and a moderation toolbar will appear
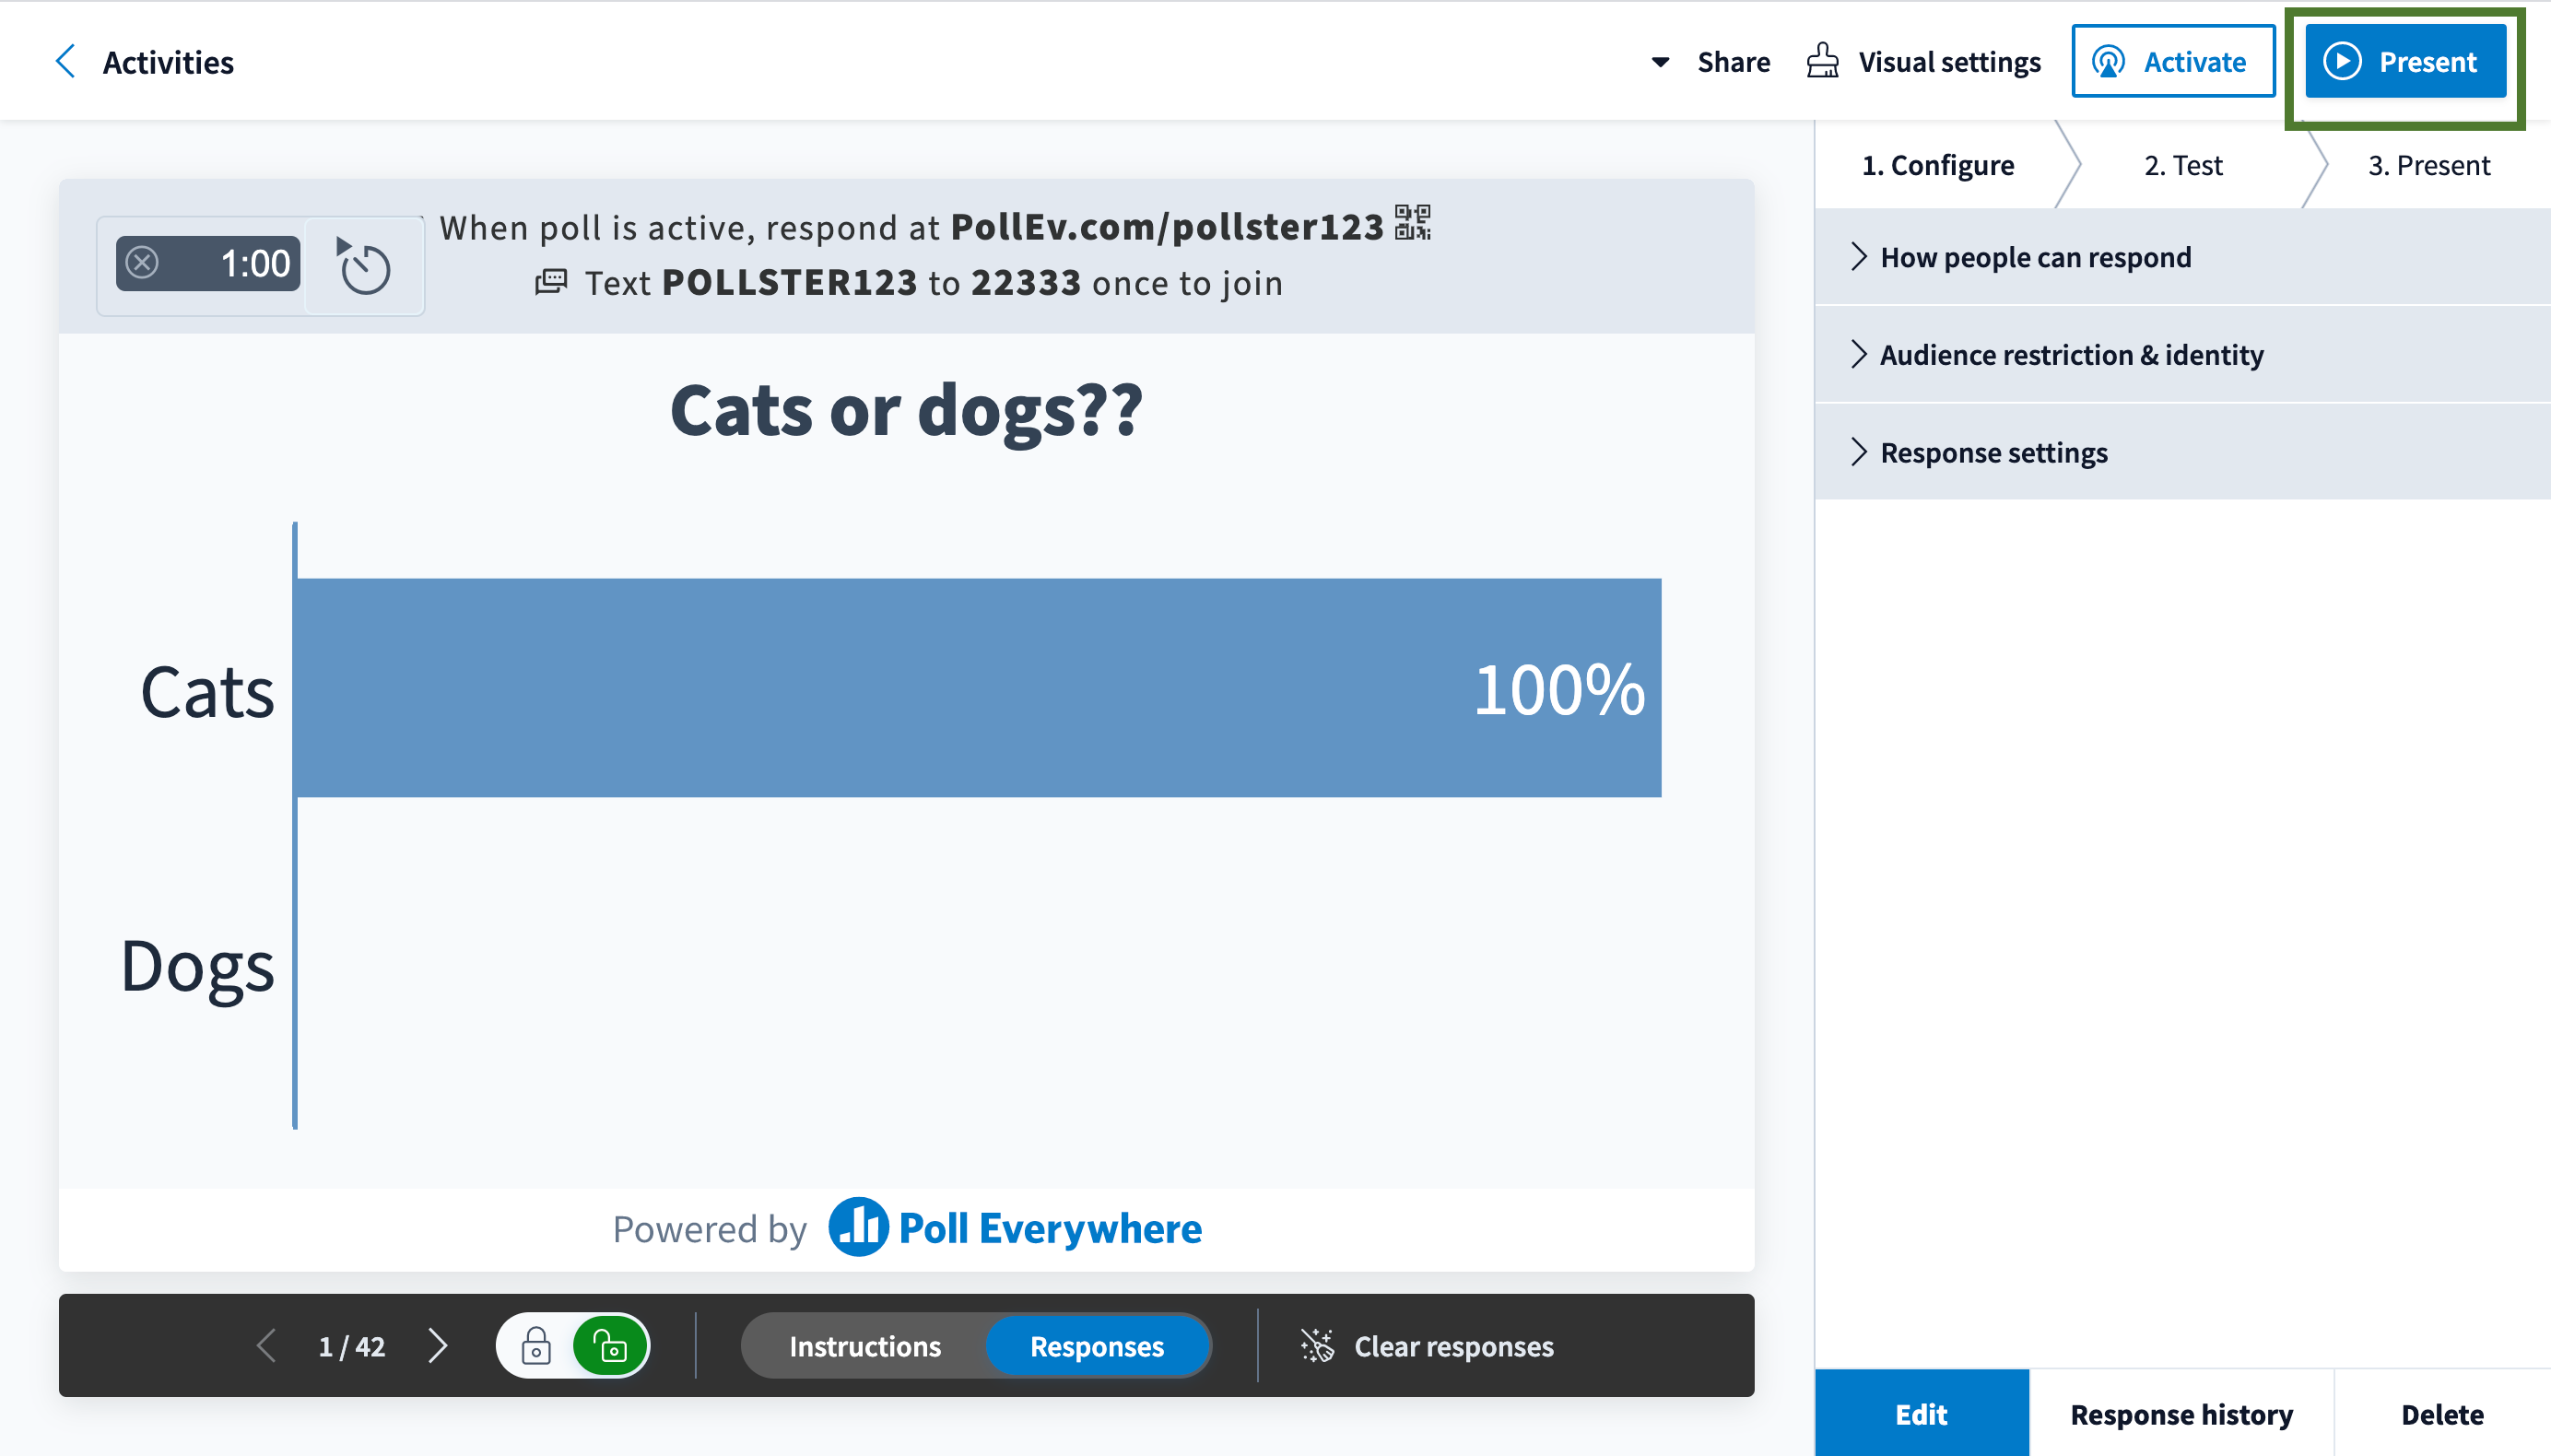
- When running a poll from your web browser, the process is very similar except you have buttons to Present or Activate. You also have Next and Previous buttons in the bottom.
- When you click Present to go into full screen mode, the poll will automatically activate. You can also click the Activate button.
 For more details and settings on running a poll, see: https://support.polleverywhere.com/hc/en-us/articles/1260801546390-Activity-pages
Running a Report
- Run a report to see a table of student responses, particularly to see archived responses.
- From your Activities tab, use the checkboxes to select the polls or folder that you want to see participation for, then click “Create Report” from the menu options that appear above your polls/folders.

-
- Alternatively, you can also go to the Reports tab and click Create Report
- Select your type of report. This can be easily changed later using the filter. Two common reports are:
 Gradebook: a table of all students with an aggregate “Participation” percentage and responses/correctness for each poll
- Executive Summary: a summary of responses and engagement by poll
- Only this option is available if you marked your polls as anonymous, meaning IDs and/or screen names were not created for unregistered participants.
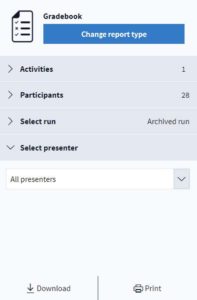
- Filter the report using the right menu, as needed. The table will automatically update based on filters.
- Change the report type, set of activities included in the report, set of participants (if you set up students as a “group”), and Presenter if multiple presenters used the poll.
- To see archived responses, click Select Run and then choose a set of archived responses from the dropdown.
- Click Download to get a csv of the report, if desired.
Managing your polls
- Create Folders of questions for each day or unit of class to help keep polls organized and speed up report creation.
- Complete bulk actions (Send a Copy, Duplicate, Move, Clear Responses, etc.)
- Go to your list of polls and use the checkboxes to select a set of polls (or folders)
- You can also hold Shift and click to select a bunch of items
- Once you have selected at least one poll or folder, a toolbar will appear with bulk actions:
- Go to your list of polls and use the checkboxes to select a set of polls (or folders)
To learn more about Poll Everywhere or get additional support, please contact the Center for Teaching and Learning at ctl@wustl.edu or (314) 935-6810.