Kaltura Tutorials:
How to Edit your Media
How to Edit media using Kaltura on Canvas
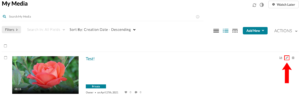
- Go to Kaltura My Media or Kaltura Media Gallery and click on the pencil (edit) icon on the video you want to edit:
-
-
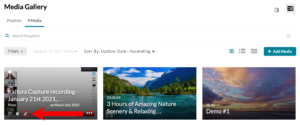
For Kaltura Media Gallery, click on the “…” icon to display the edit button:
-
-
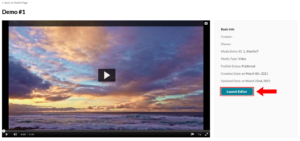
- Once you’re in the Edit page, click on the “Launch Editor” button:
- Once you’re in the Editor, you will be met with the following interface:
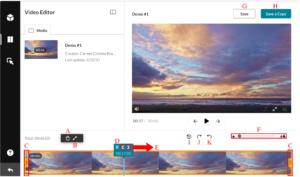
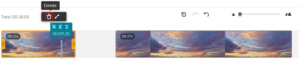
- A: Delete Tool → Select the portion of the video you want deleted by clicking on it and then hit the trash can to perform the action:
↓

-
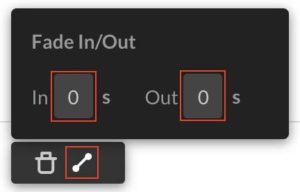
- B: Fade Tool → Click on the icon to open up the Fade In/Out menu and change the “0” to the desired time:
-
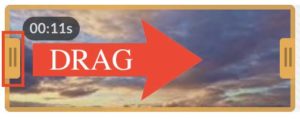
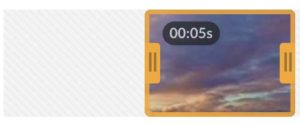
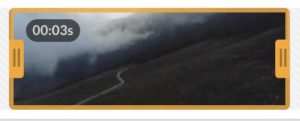
- C: Trim Tool → Click and hold on the yellow edges and then drag them around the timeline to trim your video:
↓
-
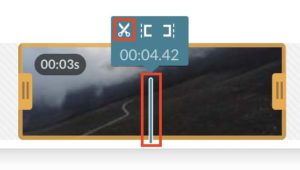
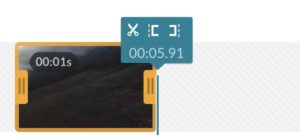
- D: Split Tool → Click on the exact time on your timeline that you want to split from the rest and click on the scissors icon to perform the action:
↓
↓
-
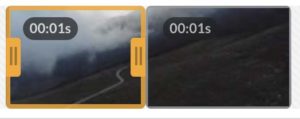
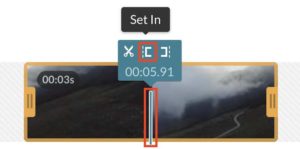
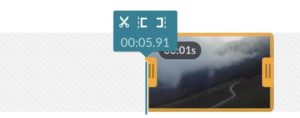
- E: Set Tool → Select the point on the timeline you’d like your video to begin (Set In) or to end (Set Out) then click on the “[“ icon to Set In or “]” to Set Out.
-
- Set In:
↓
-
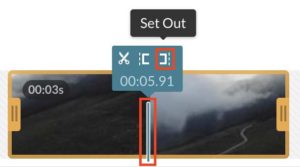
- E: Set Tool → Select the point on the timeline you’d like your video to begin (Set In) or to end (Set Out) then click on the “[“ icon to Set In or “]” to Set Out.
-
-
-
- Set Out:
-
-
↓
-
- F:
 Timeline Zoom Tool → Slide the circle icon through the line to either make your timeline bigger or smaller.
 - G:
 Save Tool → Click on “Save” to save your changes.
 - H:
 Save A Copy Tool → Click on “Save a Copy” to save a copy of your video with the changes if you want to keep the original one.
 - I:
 Reset Tool → Click on the reset icon to undo all changes.
 - J:
 Redo Tool – Click on the redo icon to bring back something you undid.
 - K:
 Undo Tool → Click on the undo icon to revert your latest change.
- F:
How to use Captions with Kaltura on Canvas
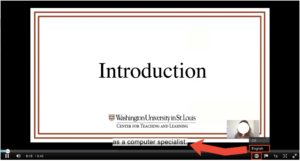
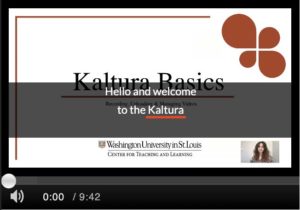
- Kaltura automatically generates Closed Captions. To turn them on, press the “CC” icon on the video and then select from the languages available:
- Closed Captions are generated via automated transcription which means the words can be inaccurate with what is being said. Fortunately, Kaltura offers the option to edit those transcriptions:
- Click on the captions tab and then on “Edit Captions” button:

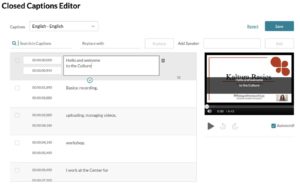
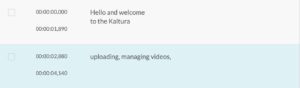
- You will then be taken to the Closed Captions Editor:
-
-
-
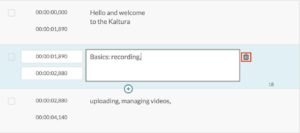
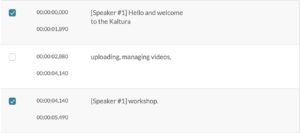
To Edit → Click on the desired caption you want to edit and enter the correct text:
-
-


↓

-
-
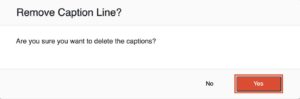
- To Delete → Click on the trash icon next to the caption you want to delete and then hit “Yes”:
-
↓
↓
-
-
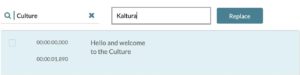
- To Replace → Type in the word you want replaced in the “Search in Captions” box then type in the word you want to be used as the replacement in the “Replace with” box and then hit “Replace”:
-

↓
↓

-
-
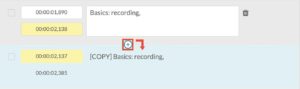
- To Add a Caption → Click on the “+” icon to add a new row of captions, this will duplicate the caption above, but you can edit the text as normal:
-
-
-
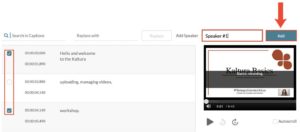
- To Add a Speaker → Enter the speaker’s name in the box next to the “Add Speaker” button then check the checkboxes next to the captions that are assigned to that speaker. Once you’re done hit the “Add Speaker” button:
-
↓
-
-
- To Revert → Click on the “Revert” button to undo all your changes.
- To Save → Click on the “Save” button to save all your changes.
- To Autoscroll → Check (on) or uncheck (off) the checkbox next to “Autoscroll” to turn autoscroll on and off.
-
How to add Thumbnails to Kaltura media on Canvas
- Go to Kaltura My Media or Kaltura Media Gallery and click on the pencil (edit) icon on the video you want to add a Thumbnail to.
- Click on the “Thumbnails” tab:

- Upload Thumbnail → Click on this button to upload an image from your desktop and use
- it as the default thumbnail.
- Capture → Use the video player to scroll through the video until you find a frame you
- would like to use as your default thumbnail and then click on the Capture button.
- Auto-Generate → Click on this button to select one thumbnail from ten automatically
- generated thumbnails of this video and set it as the default thumbnail.
- Download → Download your current thumbnail.